i3 Window Manager Tip: Making specific applications (and child windows) open in ‘floating’ mode, or with other custom settings!
If you’ve used the i3 window manager you’ve probably noticed that it does a good job of respecting ‘hints’ in applications for deciding how windows should work when the ’tiling’ paradigm is not the most optimal choice. A good example of this is The Gimp image editing application, which opens it’s tool panels and work-space in floating window mode, by default. However, many applications don’t have these ‘hints’ present in their metadata, or maybe we disagree with the ‘default’ hinting (or lack thereof) and want to use a floating window, or turn off borders, or some other setting on an application-specific basis. Here’s how!
Add the following to the end of your i3 config file (~/.i3/config):
#### RULES FOR SPECIFIC APPLICATIONS ####

# by APPLICATION (WM_CLASS)
# Note: class is typically useful for applying custom settings to
#       to entire applications, including child windows. If this
#       isn't want you want see the ROLE section, below.
# Tip: To find out what these values might be run:
#       xprop | grep -i 'class'
for_window [class="File-roller"] floating enable, border normal
for_window [class="Speedcrunch"] floating enable, border normal
for_window [class="Gloobus-preview"] floating enable, border none
for_window [class="Pavucontrol"] floating enable, border normal

# by ROLE (WM_WINDOW_ROLE)
# Note: window_role is Typically useful for effecting child windows
#       such as instant messaging converstations, email composition
#       windows, etc.
# Tip: To find out what these values might be run:
#       xprop | grep -i 'role'#
for_window [window_role="conversation"] floating enable, border normal
for_window [window_role="Msgcompose"] floating enable, border normal
This is fairly self-explanatory, so just read through it and modify the ‘for_window’ lines to suite your application-specific needs. I like to keep the notes on finding a window’s ‘class’ and ‘role’ in the config file so you don’t have to worry about forgetting that rarely used ‘xprop’ command! Xprop is pretty well explained above, so just run the appropriate xprop/grep command combo above, while your application is running, and when the mouse cursor changes you just click anywhere on the desired application window. Now, once you’ve clicked, xprop tells you the WM_CLASS or WM_WINDOW_ROLE value for the application, and politely exits. All that’s left is to just plug that value in to the ‘class=’ or ‘window-role=’ variable, respectively.
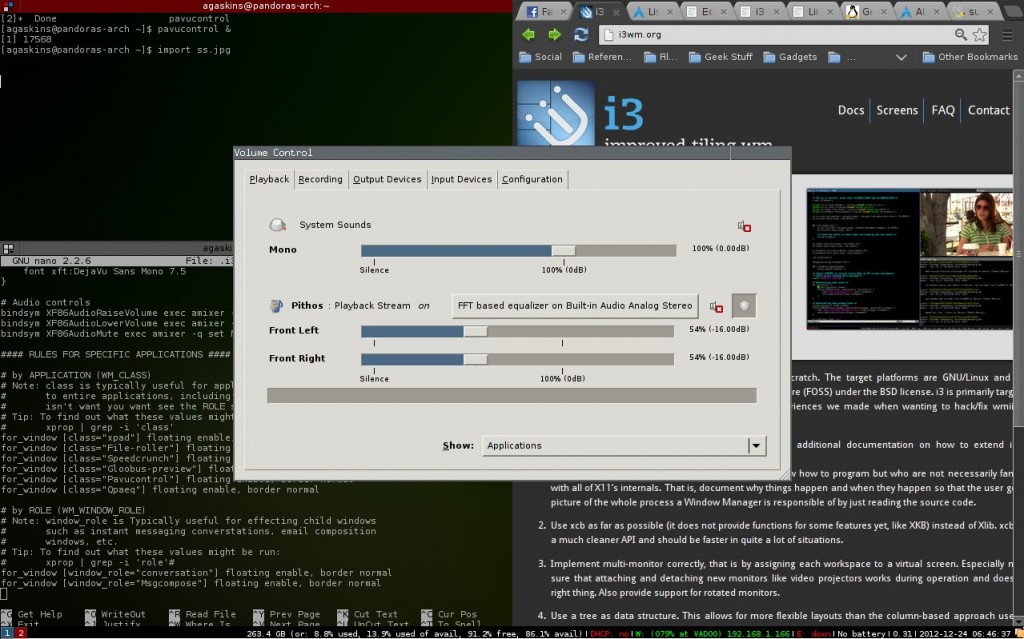
Also worth mentioning is that in the first section, ‘by APPLICATION’, I have specified several applications which I find to be better suited to the ‘floating window’ paradigm (‘floating enable’). These applications consist of an archive extraction tool called File-roller, a very handy calculator called SpeedCrunch, a Nautilus file-manager file-preview tool known as Gloobus-preview, and a popular PulseAudio preferences applet named ‘pavucontrol’. You will likely use some different applications, so just use these as example starting-points.
Alternatively, in the ‘by ROLE’ section, the line in which I have specified “conversation” is used to make ONLY Pidgin instant-messaging conversation windows use floating mode, but not the main window of Pidgin (which is the contact list window). Likewise, the line containing “Msgcompose” is used to make the ‘compose an email’ editor window of Thunderbird use floating mode. Please note, that while the values ‘conversation’ and ‘Msgcompose’ may be conventions that work with other instant messaging clients and email applications, I have only tested it with the programs mentioned here. If your application choices differ I recommend that you use xprop to verify these values!
You may also notice that most of these lines also specify that the border should be ‘normal’, meaning it shows the i3 WM’s 1px border and the title-bar. Keep in mind, all of this is just my personal preference, so by all means tweak this stuff as you see fit!
Once you edit the file to your liking reload the i3 WM configuration using ‘i3 restart’ or mod+shift+r (both of these methods restart i3 ‘in place’, preserving your current session). Now give it a try, and enjoy!


Thanks a lot, this was helpful
Thanks for sharing this “tiny”, but important detail.
The not-floating thunderbird composer windows annoyed me for while.
Hi
Very interesting article!
One thing I would like to know is how fix the dimensions of a certain application
Let’s say some calculator, I want it to be small, strictly as small as needed to be, or some small size that I indicate
How do I do that?
for_window [class=”calculatorname”] ????????
Thanks